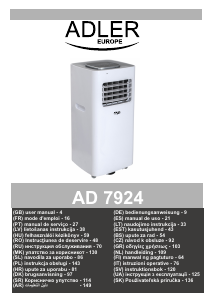
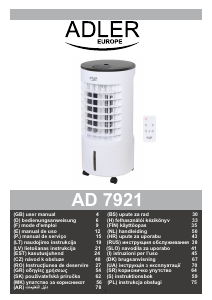
Kasutusjuhend Adler AD 7922 Kliimaseade

Kas vajate oma Adler AD 7922 Kliimaseade’i jaoks kasutusjuhendit? Allpool saate vaadata ja tasuta alla laadida eestikeelset PDF-juhendit. Sellel tootel on praegu 7 korduma kippuvaid küsimusi, 0 kommentaare ja 4 hääli keskmise tootehinnanguga 25/100. Kui see pole teie soovitud juhend, võtke meiega ühendust.

Kas teie toode on defektne ja kasutusjuhendist pole abi? Tasuta remonditeenused: Repair Café.

Kasutusjuhend

Loading…

4
21. Do not place any objects on the device.
22. The device can be used only with properly working ventilation.
DEVICE DESCRIPTION (Figure A).
1.Control panel
2.Vertical louvers
3.Horizontal louvers
4.Wheels
5. Plastic containers
6. Inner filter
7. Air inlet cover
8.Water tank
9.Water tank lock
10.Remote control
BEFORE FIRST USE
Installation instructions for casters:
Take out the 4 casters from package. Turn the device upside down on flat surface with soft cloth or mat during assembling to prevent
scratches. Align the caster shaft with the caster installation hole in the body bottom and press firmly to the end. Look at figure C.
USING THE DEVICE
A noticeable reduction in the temperature of the outlet air occurs after putting into the water tank (8) the plastic containers (5) attached
to the product. The plastic containers should be previously frozen in the freezer for few hours. It is recommended to fill the plastic
container (5) with cold tap water and do not exceed MAX level marked on the plastic container. The content of plastic container is
prohibited to edible. Keep away from children.
1. Place the unit on a dry, flat surface.
2. Rotate to flat position the water tank lock (9) and pull out the water tank (8) from the back of the device. Pour clear, cold water, be
careful not to exceed the maximum level. You can pour water w/o pulling out the water tank completely. To remove water tank
completely, first remove the pump by pressing the two end tabs (figure D) and pull out the water tank (8). After water pouring, turn the
water tank lock (9) to horizontal position. Do not tilt the device after pouring the water to water tank. Do not remove water tank while the
device is plug in power supply.
3. Connect the plug to power supply, the device is in standby mode. The power indicator light is illuminated. Now can be used control
panel (1) or remote control (10) to operate the device (figure B). Turn on the device using the “ON/OFF” button (A). The device starts
working in middle speed and switches to low speed after 3 second. Press the button (A) again to switch it back to standby mode.
4. The SPEED button (B) allows you to change the speed of the fan. The following speeds can be selected: HIGH (fast), MIDDLE
(medium) and LOW (slow). The corresponding icons on the panel will light up.
5. COOL button (F) lowers the temperature of the air by running the water pump. Press the button (F) when there is water in water tank
ONLY, Additionally, a set of two plastic containers (5) is attached. Plastic containers (5) should be filled by cold, tap water and do not
exceed maximum level at first. Next, put them on several hours inside the freezer. Then put one or both of containers into water tank (8).
To blow the cool air, the device must be filled with water. When the device is operating, periodically check the water level to see whether
to add water. Press button (F) again to turn off the cold air blowing.
5. The COOL button (F) additionally lowers the air temperature by activating the water pump. Press the button (F) ONLY when there is
water in the water tank. The device is equipped with a set of two plastic containers (5). The plastic containers (5) must be filled with cold
tap water and not exceed the maximum level. Then put them in the freezer for a few hours. Next place one or both of the containers in
the water tank (8). water. While the machine is running, check the water level periodically to see if it needs add some water. Press the
button (F) again to turn off the water pump providing additional cold air blow.
6. Pressing the SWING button (C) starts the oscillation of horizontal louvers (3) that provide even distribution of cold air stream in range
60° in left and right direction. Vertical louvers (2) do not move automatically, so if necessary, manually adjust them to point up or down.
The corresponding indicator turn on.
7. The TIMER button (D) allows for programming the amount of time during which the device will operate before turning itself off
automatically, if the TIMER function is not used, the device will work until it is manually turned off. The turn off time can be set in half-
hour increments from 0,5 to 7,5 hours. There are 4 indicators: 0,5H, 1H, 2H and 4H. For example if the timer is set up for 3 hours, the
1H and 3H indicators turn on.
8. The MODE button (E) allows for changing between one of below tree fan modes NORMAL, NATURAL and SLEEP by repeating
pressing:
- The “NORMAL mode setting up:
“NORMAL” mode operation means blowing on one of chosen speeds:
H: HIGH FAN SPEED,
M: MIDDLE FAN SPEED,
L: LOW FAN SPEED
- The “NATURAL” mode mimics the natural wind action by repeating the fan speed sequence:
When choose the low fan speed: Air flow cycle: L(4seconds) -> M(6seconds) -> stop(2seconds -> L(6seconds -> M(10seconds) ->
L(4seconds) -> M(6seconds) -> stop(2seconds) -> M(2seconds) -> L(4seconds) -> stop(2seconds) -> L(10seconds) -> M(2seconds) ->
stop(4seconds) -> L(2seconds) -> M(6seconds) will be repeated again and again.
When choose the middle fan speed: Air flow cycle: M(6seconds) -> H(2seconds) -> L(6seconds -> M(8seconds) -> H(4seconds) ->
L(2seconds) -> M(10seconds) -> L(6seconds) -> M(8seconds) -> H(2seconds) -> stop(2seconds) -> H(4seconds) -> L(8seconds) ->
Eestikeelne juhendi allalaadimine (PDF, 4.14 MB)
(Mõelge keskkonna peale ja printige see kasutusjuhend välja ainult siis, kui see on tõesti vajalik)

Loading…

Hinnang

Andke meile teada, mida arvate tootest Adler AD 7922 Kliimaseade, jättes selle kohta hinnangu. Kas soovite jagada oma kogemusi selle tootega või esitada küsimuse? Jätke kommentaar lehe alumises servas.
Kas olete teenusega Adler AD 7922 Kliimaseade rahul?
Jah Nr
25%
75%
4 häält

Liituge selle toote teemalise vestlusega

Siin saate jagada, mida arvate Adler AD 7922 Kliimaseade kohta. Kui teil on küsimusi, lugege esmalt hoolikalt kasutusjuhendit. Kasutusjuhendit saab taotleda kasutades meie kontaktivormi.

Lisateavet selle juhendi kohta

Mõistame, et on tore, kui teil on teie Adler AD 7922 Kliimaseade jaoks paberjuhend. Juhendi saate alati meie veebisaidilt alla laadida ja ise printida. Kui soovite originaaljuhendit, soovitame võtta ühendust ettevõttega Adler. Nad võivad anda originaaljuhendi. Kas otsite oma Adler AD 7922 Kliimaseade kasutusjuhendit mõnes muus keeles? Valige meie kodulehelt oma eelistatud keel ja otsige mudelinumbrit, et näha, kas see on meil saadaval.

Tehnilised andmed

Kaubamärk Adler
Mudel AD 7922
Kategooria Kliimaseadmed
Faili tüüp PDF
Faili suurus 4.14 MB

Kõik Adler Kliimaseadmed kasutusjuhendid
Veel Kliimaseadmed käsiraamatuid

Korduma kippuvad küsimused Adler AD 7922 Kliimaseade kohta

Meie tugimeeskond otsib kasulikku tooteteavet ja vastuseid korduma kippuvatele küsimustele. Kui leiate meie korduma kippuvates küsimustes ebatäpsusi, andke sellest meile teada, kasutades kontaktivormi.

Kui tihti peaksin kliimaseadme filtreid puhastama või vahetama? Kontrollitud

Kliimaseadme filtreid on soovitatav kontrollida 4 korda aastas. Määrdunud filtreid saab puhastada tolmuimejaga või pesta sõltuvalt tüübist. Hoolduse ajal peaks professionaal otsustama, kas on aeg filtrid välja vahetada.

Sellest oli abi (2691) Loe rohkem

Mida tähendab BTU? Kontrollitud

BTU tähistab Briti soojusüksust. See ühik näitab jahutusvõimet.

Sellest oli abi (959) Loe rohkem

Kas iga kliimaseade toimib ka õhukuivatina? Kontrollitud

Kliimaseadme toodetud külmas õhus on sageli suhteliselt madal niiskus. Mõju on aga väiksem kui tegeliku õhukuivati ​​kasutamisel. Mõnel kliimaseadmel on õhu kuivatamiseks spetsiaalne funktsioon.

Sellest oli abi (713) Loe rohkem

Mis on R-410A? Kontrollitud

R-410A on jahutusaine, mida kasutatakse seadmetes, mis jahutavad kuni 0 ° C, nagu külmikud ja kliimaseadmed. See asendab vanemaid jahutusaineid ega kahjusta osoonikihti.

Sellest oli abi (492) Loe rohkem

Milline on parim koht split-tüüpi kliimaseadme siseseadme paigaldamiseks? Kontrollitud

See sõltub ruumist, kuid üldiselt saab järgida järgmisi reegleid. Veenduge, et miski ei takistaks õhuvoolu. Veenduge, et asukoht on hoolduseks juurdepääsetav. Paigaldage seade maapinnast vähemalt 2 meetri kaugusele.

Sellest oli abi (354) Loe rohkem

Kas ma saan oma mobiilse kliimaseadme kappi paigutada, et see silmist eemal hoida? Kontrollitud

Ei, absoluutselt mitte. Mobiilne kliimaseade vajab ruumi õhuvoolu ja õhu sisselaskmise võimaldamiseks. Väikeses ruumis võib seade üle kuumeneda.

Sellest oli abi (353) Loe rohkem

Kas kliimaseade mõjutab õhukvaliteeti negatiivselt? Kontrollitud

Kui kliimaseadet on korralikult hooldatud, ei mõjuta see õhukvaliteeti. Kui näiteks filtrit pole pikka aega vahetatud või muud hooldust pole tehtud, võib konditsioneer tekitada määrdunud õhku.

Sellest oli abi (350) Loe rohkem
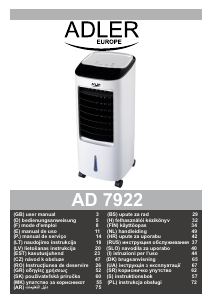
Kasutusjuhend Adler AD 7922 Kliimaseade

Seotud tooted

Seotud kategooriad