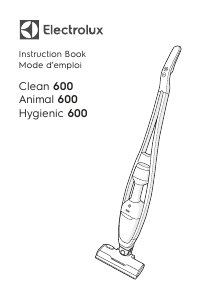
Kasutusjuhend Electrolux EER75NOW Tolmuimeja
Kas vajate oma Electrolux EER75NOW Tolmuimeja’i jaoks kasutusjuhendit? Allpool saate vaadata ja tasuta alla laadida eestikeelset PDF-juhendit. Sellel tootel on praegu 10 korduma kippuvaid küsimusi, 0 kommentaare ja 2 hääli keskmise tootehinnanguga 100/100. Kui see pole teie soovitud juhend, võtke meiega ühendust.
Kas teie toode on defektne ja kasutusjuhendist pole abi? Tasuta remonditeenused: Repair Café.
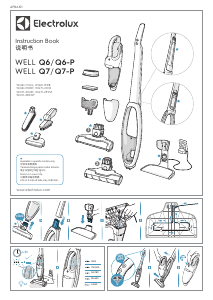
Kasutusjuhend
Loading…


Loading…
Hinnang
Andke meile teada, mida arvate tootest Electrolux EER75NOW Tolmuimeja, jättes selle kohta hinnangu. Kas soovite jagada oma kogemusi selle tootega või esitada küsimuse? Jätke kommentaar lehe alumises servas.Lisateavet selle juhendi kohta
Mõistame, et on tore, kui teil on teie Electrolux EER75NOW Tolmuimeja jaoks paberjuhend. Juhendi saate alati meie veebisaidilt alla laadida ja ise printida. Kui soovite originaaljuhendit, soovitame võtta ühendust ettevõttega Electrolux. Nad võivad anda originaaljuhendi. Kas otsite oma Electrolux EER75NOW Tolmuimeja kasutusjuhendit mõnes muus keeles? Valige meie kodulehelt oma eelistatud keel ja otsige mudelinumbrit, et näha, kas see on meil saadaval.
Tehnilised andmed
| Kaubamärk | Electrolux |
| Mudel | EER75NOW |
| Kategooria | Tolmuimejad |
| Faili tüüp | |
| Faili suurus | 5.2 MB |
Kõik Electrolux Tolmuimejad kasutusjuhendid
Veel Tolmuimejad käsiraamatuid
Korduma kippuvad küsimused Electrolux EER75NOW Tolmuimeja kohta
Meie tugimeeskond otsib kasulikku tooteteavet ja vastuseid korduma kippuvatele küsimustele. Kui leiate meie korduma kippuvates küsimustes ebatäpsusi, andke sellest meile teada, kasutades kontaktivormi.
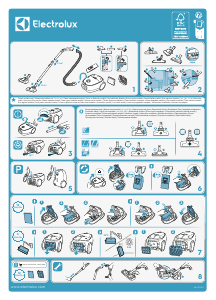
Minu tolmuimeja voolik on ummistunud, mida teha? Kontrollitud
Eemaldage voolik ja vaadake see läbi, et teha kindlaks, kas see on tõesti ummistunud. Sellisel juhul võite võtta pika eseme, näiteks luudakese ja suruda selle ettevaatlikult voolikust läbi. See eemaldab üldiselt kõik voolikut ummistavad esemed. Kui see ei aidanud, võtke ühendust tootjaga.
Sellest oli abi (1464) Loe rohkemMis suurusega tolmukott on olemas? Kontrollitud
Kaaluda tuleb kahte suurust. Esiteks on koti sissepääsuga plaadi suurus. See määrab, kas tolmukott sobib teatud tolmuimejale. Siis on koti suurus. Seda näidatakse enamasti liitrites ja see määrab, kui palju tolmu kott mahutab.
Sellest oli abi (941) Loe rohkemSoovin teada oma Electroluxi seadme vanust. Kuidas seda teha? Kontrollitud
Toote vanuse saate määrata seerianumbri abil. Selle leiate oma seadmest. Seerianumbri esimene märk tähistab aastat (st: 1 = 2001) ja kaks tähemärki pärast seda näitavad tootmisnädalat (st: 35 = selle aasta 35. nädal). Seega näitab seerianumber 13500016, et masin on pärit 2001. aasta 35. nädalast.
Sellest oli abi (836) Loe rohkemMinu tolmuimeja toitejuhe ei keri seadmesse tagasi, mida teha? Kontrollitud
Võimalik, et juhtmes on väänet või voldikut. Rullige juhe paar korda täielikult välja ja kerige see käte juhendamisel tagasi seadmesse. Kui see probleemi ei lahenda, on juhtme tagasikerimise mehhanism katki. Sellisel juhul võtke ühendust tootja või remonditeenindusega.
Sellest oli abi (658) Loe rohkemMinu tolmuimeja teeb vilistavat häält, mida teha? Kontrollitud
Selle probleemi põhjuseks on sageli täis tolmukott või filter või kui seal on ava, mis laseb voolikusse õhku. Kontrollige tolmukotti ja filtrit ning vajadusel vahetage need välja. Kontrollige, kas voolikul pole auke ega halbu ühendusi. Kui see probleemi ei lahenda, võtke ühendust tootjaga.
Sellest oli abi (551) Loe rohkemKuidas tolmu ja juukseid tolmuimeja harjapea küljest eemaldada? Kontrollitud
Tolmu ja juuste eemaldamine tolmuimeja harjapeast on tehtud käsitsi. Kui see ei lähe soovitud viisil, on võimalik ülejäänud mustuse eemaldamiseks kasutada peent kammi.
Sellest oli abi (536) Loe rohkemMillist tolmuimeja harjapea seadet peaksin kasutama? Kontrollitud
Peaaegu kõigil tolmuimejatel on reguleeritava harjaga pea. Kasutage pintslit kõvade pindade jaoks, et vältida kriimustusi ja kahjustusi. Vaipade ja vaipade jaoks lülitage harja välja.
Sellest oli abi (419) Loe rohkemKas ma saan paberitolmukotti kasutada rohkem kui üks kord? Kontrollitud
See ei ole soovitav. Koti vatti poorid küllastuvad, põhjustades imemise kadu ja kahjustades mootorit.
Sellest oli abi (286) Loe rohkemMis on HEPA? Kontrollitud
HEPA tähistab kõrge efektiivsusega tahkete osakeste õhku. Paljudel tolmuimejatel on HEPA -filter. HEPA -filter peatub vähemalt 85% ja kõige rohkem 99,999995% kõigist osakestest, mille suurus on 0,3 mikromeetrit (µm) ja rohkem.
Sellest oli abi (259) Loe rohkemKas ma saan tuha imemiseks kasutada tavalist tolmuimejat? Kontrollitud
Ei, see pole absoluutselt võimalik. Jahtununa tunduv tuhk võib olla seest veel soe või isegi kuum. Tavaline tolmuimeja pole selleks ette nähtud ja see võib põhjustada tulekahju. Samuti ei sobi tavaliste tolmuimejate filtrid alati eriti väikeste osakeste, näiteks tuha, hoidmiseks. Seejärel võib see jõuda tolmuimeja mootorini ja põhjustada kahjustusi.
Sellest oli abi (251) Loe rohkem

Liituge selle toote teemalise vestlusega
Siin saate jagada, mida arvate Electrolux EER75NOW Tolmuimeja kohta. Kui teil on küsimusi, lugege esmalt hoolikalt kasutusjuhendit. Kasutusjuhendit saab taotleda kasutades meie kontaktivormi.