Kasutusjuhend Greenworks G24AG Nurklihvija

Kas vajate oma Greenworks G24AG Nurklihvija’i jaoks kasutusjuhendit? Allpool saate vaadata ja tasuta alla laadida eestikeelset PDF-juhendit. Sellel tootel on praegu 4 korduma kippuvaid küsimusi, 0 kommentaare ja sellel on 0 hääli. Kui see pole teie soovitud juhend, võtke meiega ühendust.

Kas teie toode on defektne ja kasutusjuhendist pole abi? Tasuta remonditeenused: Repair Café.

Kasutusjuhend

Loading…

EN
DE ES IT FR PT NL RU FI SV NO DA PL CS SK SL HR HU RO BG EL AR TR HE LT LV ET
English (Original Instructions)
3
Inspect the product carefully to make sure no breakage
or damage occurred during shipping.
Do not discard the packing material until you have
carefully inspected and satisfactorily operated the tool.
WARNING
If any parts are damaged or missing do not operate
this product until the parts are replaced. Use of this
product with damaged or missing parts could result in
serious personal injury.
WARNING
Do not attempt to modify this product or create
accessories not recommended for use with this
product. Any such alteration or modication is misuse
and could result in a hazardous condition leading to
possible serious personal injury.
WARNING
To prevent accidental starting that could cause
serious personal injury, always remove the battery
pack from the product when assembling parts.
Battery Charging
Use only the chargers listed in the technical data. Only
these chargers are matched to the lithium-ion battery
of your power tool.
Note: The battery supplied is partially charged. To ensure
full capacity of the battery, completely charge the battery
in the battery charger before using your power tool for the
rst time.
The lithium-ion battery can be charged at any time
without reducing its service life. Interrupting the charging
procedure does not damage the battery.
The lithium-ion battery is protected against deep
discharging by the “Electronic Cell Protection (ECP)”.
When the battery is empty, the machine is switched off by
means of a protective circuit: The inserted tool no longer
rotates.
Do not continue to press the On/Off switch after the
machine has been automatically switched off. The
battery can be damaged.
Observe the notes for disposal.
Removing the battery (see gure A)
To remove the battery, press the battery unlocking button
13 and pull the battery 12 out of the power tool toward the
rear. Do not exert any force.
Installing Grinding Wheel (see gure B)
DANGER
Never attach a wood cutting or carving blade of any
type to this grinder. It is only designed for grinding
and sanding. Use for any other purpose is not
recommended and creates a hazard, which will result
in serious injury.
WARNING
Thoroughly inspect a new grinding wheel before you
install it on the grinder.
Tap lightly around the wheel using a wooden
hammer.
Listen carefully to the resulting sounds. Places with
fissures or cracks will result in a different sound.
Do not use a wheel containing ssures or cracks.
When you install a new grinding wheel, carry out a no
load revolution test of approximately one minute with
the grinding wheel facing a safe direction, i.e., away
from people or objects.
Depress the spindle lock button and rotate the clamp
nut until the spindle locks.
NOTE: To prevent damage to the spindle or spindle
lock, always allow motor to come to a complete stop
before engaging spindle lock.
Loosen (fig.B.3) and remove the clamp nut from the
spindle. Do not remove the disc flange.
Make sure the flats on the bottom of the disc flange are
engaged with the flats on the spindle.
Place the grinding wheel over the spindle.
WARNING
Always install a grinding wheel with the depressed
center against the disc ange. Failure to do so will
cause the grinding wheel to crack when tightening the
clamp nut. This could result in serious personal injury
because of loose particles breaking off and being
thrown from the grinder. Do not overtighten.
Thread the clamp nut on the spindle with the flat side
of the nut facing up.
Fit the raised, small diameter portion of the clamp nut
into the hole in the wheel and finger tighten.
Depress the spindle lock button and rotate the wheel
clockwise (fig.B.2) until the spindle locks in position.
Tighten the clamp nut securely with the wrench 14
provided. Do not overtighten.
Installing The Side Handle (see gure C)
WARNING
The side handle must always be used to help prevent
loss of control and possible serious injury.
The side handle can be installed on the left or right side of
the grinder, depending on operator preference.
Insert the side handle into the desired operating
Eestikeelne juhendi allalaadimine (PDF, 1.92 MB)
(Mõelge keskkonna peale ja printige see kasutusjuhend välja ainult siis, kui see on tõesti vajalik)

Loading…

Hinnang

Andke meile teada, mida arvate tootest Greenworks G24AG Nurklihvija, jättes selle kohta hinnangu. Kas soovite jagada oma kogemusi selle tootega või esitada küsimuse? Jätke kommentaar lehe alumises servas.
Kas olete teenusega Greenworks G24AG Nurklihvija rahul?
Jah Nr
Olge esimene, kes seda toodet hindab
0 häält

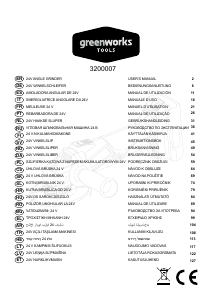
Liituge selle toote teemalise vestlusega

Siin saate jagada, mida arvate Greenworks G24AG Nurklihvija kohta. Kui teil on küsimusi, lugege esmalt hoolikalt kasutusjuhendit. Kasutusjuhendit saab taotleda kasutades meie kontaktivormi.

Lisateavet selle juhendi kohta

Mõistame, et on tore, kui teil on teie Greenworks G24AG Nurklihvija jaoks paberjuhend. Juhendi saate alati meie veebisaidilt alla laadida ja ise printida. Kui soovite originaaljuhendit, soovitame võtta ühendust ettevõttega Greenworks. Nad võivad anda originaaljuhendi. Kas otsite oma Greenworks G24AG Nurklihvija kasutusjuhendit mõnes muus keeles? Valige meie kodulehelt oma eelistatud keel ja otsige mudelinumbrit, et näha, kas see on meil saadaval.

Tehnilised andmed

Kaubamärk Greenworks
Mudel G24AG
Kategooria Nurklihvijad
Faili tüüp PDF
Faili suurus 1.92 MB

Kõik Greenworks Nurklihvijad kasutusjuhendid
Veel Nurklihvijad käsiraamatuid

Korduma kippuvad küsimused Greenworks G24AG Nurklihvija kohta

Meie tugimeeskond otsib kasulikku tooteteavet ja vastuseid korduma kippuvatele küsimustele. Kui leiate meie korduma kippuvates küsimustes ebatäpsusi, andke sellest meile teada, kasutades kontaktivormi.

Millistel materjalidel saan oma nurklihvijat kasutada. Kontrollitud

Nurgaveskid sobivad kõige paremini metallile või kivile. Masinad toodavad palju soojust ja on seetõttu vähem sobivad puidu või plastiga töötamiseks.

Sellest oli abi (63) Loe rohkem

Kas nurklihvija kasutamisel pean kandma kuulmiskaitsevahendeid? Kontrollitud

Jah, peaksite. Kuigi nurklihvmasina tekitatud müra võib eri kaubamärkide ja mudelite lõikes erineda, võib pikaajaline kokkupuude valju müraga põhjustada püsivaid kuulmiskahjustusi. Sellepärast on hea mõte kanda kuulmiskaitsevahendeid.

Sellest oli abi (16) Loe rohkem

Kas nurklihvija kasutamisel pean kandma silmade kaitset? Kontrollitud

Jah. Jahvatamise ajal võivad väikesed osakesed üles lennata. Kui need satuvad silma, võivad need põhjustada püsivaid silmakahjustusi. Seetõttu on alati vaja kanda kaitseprille.

Sellest oli abi (14) Loe rohkem

Kas elektritööriistu saab hoida kuuris või garaažis? Kontrollitud

Üldjuhul saab elektritööriistu hoida kuuris või garaažis, isegi kui seal vahel külmub. Elektritööriista eluea jaoks on aga parem hoida seda kuivas, ilma suuremate temperatuurikõikumisteta kohas. Kuuris või garaažis võivad temperatuuride erinevused põhjustada kondensaadi teket, mis võib põhjustada roostetamist. Lisaks peavad akudel töötavad tööriistad lühemalt vastu ja ei lae väga madalatel temperatuuridel nii hästi. Et olla kindel, kuidas teie elektritööriista tuleb hoida, lugege kasutusjuhend alati põhjalikult läbi.

Sellest oli abi (4) Loe rohkem
Kasutusjuhend Greenworks G24AG Nurklihvija

Seotud tooted

Seotud kategooriad