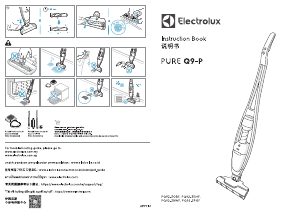
Kasutusjuhend Electrolux PD91-ANIMA Tolmuimeja

Kas vajate oma Electrolux PD91-ANIMA Tolmuimeja’i jaoks kasutusjuhendit? Allpool saate vaadata ja tasuta alla laadida eestikeelset PDF-juhendit. Sellel tootel on praegu 10 korduma kippuvaid küsimusi, 0 kommentaare ja sellel on 0 hääli. Kui see pole teie soovitud juhend, võtke meiega ühendust.

Kas teie toode on defektne ja kasutusjuhendist pole abi? Tasuta remonditeenused: Repair Café.

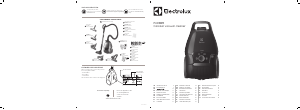
Kasutusjuhend

Loading…

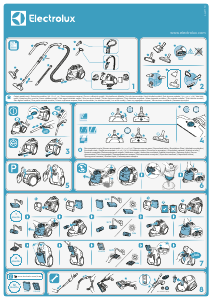
1 32 4
2www.electrolux.com
13 14
17
16 18
5 876
9
1211
2625
19 20
22
21
15
10
23
24
3www.electrolux.com
ENGLISH
Thank you for choosing Electrolux PURED9 vacuum cleaner. Always
use original accessories and spare parts to get the best results. This
product is designed with the environment in mind. All plastic parts are
marked for recycling purposes.
BEFORE STARTING
• Read this manual carefully.
• Check that all parts described are included.
• Pay special attention to the safety precautions!
DESCRIPTION OF PURED9 VACUUM CLEANER
A. Display (see versions later)
B. Exhaust lter lid
C. Exhaust lter
D. Parking slots
E. Power cord
F. Motor lter
G. Motor lter holder
H. S-bag®
I. S-bag® holder
J. Dust compartment cover
K. AeroPro 3in1 tool
L. AeroPro hose
M. AeroPro handle (see versions
later)
N. AeroPro telescopic tube
O. Parking clip
P. Display for models with rotary
knob manual control*
Q. Display for models with remote
control*
R. Display for models with remote
control and AUTO function*
S. AeroPro Classic handle*
T. AeroPro Ergo handle*
U. AeroPro Remote Control
handle*
V. AeroPro FlowMotion nozzle*
W. AeroPro PureVision nozzle
(with front lights)*
X. AeroPro Turbo nozzle*
Y. AeroPro Mini Turbo nozzle*
Z. ParkettoPro nozzle*
AA. AeroPro FlexProPlus nozzle*
AB. AeroPro Long crevice nozzle*
* Certain models only
HOW TO USE THE VACUUM CLEANER
1 Open the dust compartment cover by pulling the S-BAG button. Check
that the dust bag (s-bag) is in place.
2 Insert the hose into the cleaner (to remove it, press the lock buttons
and pull). Insert the hose into the hose handle until the lock button
clicks (to release it, press the lock button
and pull).
3 Attach the telescopic tube to the nozzle. Attach the telescopic tube to
the hose handle (to remove it, press the lock button and pull).
4 Adjust the telescopic tube by holding the lock with one hand and
pulling the handle with the other hand.
START/STOP THE VACUUM CLEANER AND ADJUST SUCTION POWER
5 Pull out the power cord and plug it into the mains. Press the ON/
OFF button to turn the cleaner on/o. Indicators light up, MIN/MAX
indicator lights up from left to right and back (auto function models).*
Models with remote control can also be operated by the ON/OFF
button on the handle.*
6 Adjust suction power (manual control models): Turn the rotary knob on
the cleaner or use the air valve on the handle.*
7 Adjust suction power (remote control models): Press +/- button on the
handle. MIN/MAX and symbols indicators on display will show level of
power.*
8 Adjust suction power (remote control models with AUTO): The cleaner
starts in AUTO mode (automatic power regulation). AUTO indicator is
illuminated on the display and MIN/MAX indicator pulses. To regulate
power manually press +/- button on handle. Press AUTO button to
return to auto-function.*
9 After cleaning, push the REWIND button to rewind the cable.
PARKING POSITIONS
10 Use parking position on the side (A) or underneath (C) to carry and
store the cleaner. At the back (B) when you pause (save your back).
REPLACING THE DUSTBAG, SBA
11 Replace the s-bag when
- P* Models with rotary knob: S-BAG indicator lights up in red
- Q* Models with remote control: S-BAG symbol lights up red.
- R* Models with remote control and AUTO: S-BAG indicator lights up
in red (green light: bag is OK, yellow light: soon time to replace bag).
NB: Always change the s-bag when S-BAG indicator is illuminated or
has red light even if the s-bag is not full (it may be blocked) and after
using carpet cleaning powder. For best possible performance, use the
Ultra Long Performance bag which is especially developed for your
cleaner. Other synthetic s-bags can also be used. Do not use paper dust
bags! www.s-bag.com
12 Pull the S-BAG button to open the dust compartment. The handle of
the s-bag holder goes up. Pull the handle to remove the s-bag with
holder. Do not press the release button.
13 Hold the s-bag with holder over a dust bin. Press the button to release
the s-bag. Insert a new s-bag to the holder by inserting the cardboard
at the back of the holder.
14 Insert the s-bag with holder by pushing it straight down in its tracks.
Make sure the s-bag is not stuck under the holder. Close the lid. If the
s-bag is not properly placed or is missing, the lid will not close.
NB: When you start the cleaner after s-bag replacement, It takes 10
seconds before the S-BAG indicator turns o (P* Models with rotary
knob and Q* Models with remote control) or turns green (R* Models
with remote control and AUTO).
REPLACING THE FILTERS
15 Replace/clean** the lter when (**washable lter only)
- P* Models with rotary knob: you have changed the s-bag 5 times
- Q* Models with remote control: FILTER symbol lights up in red
- R* Models with remote control and AUTO: lter indicator lights up
in red. Green light indicates that the lter is ok. It lights up briey when
you start the vacuum cleaner.
16 Pull the FILTER button to open the lter lid. Use original s-lters.
Remove the lter and check the reference on the frame to dene type.
Replace with a new lter or clean it**. Rinse the inside (dirty side) in
lukewarm tap water. Tap the lter frame to remove the water. Repeat
the process four times. (*
*washable lter only)
NB: Do not use cleaning agents. Avoid touching the lter surface.
Let the lter dry completely (min. 24 h in room temperature) before
putting back ! Change the washable lter at least once a year or when it
is very dirty or damaged. Do not remove the L-shaped foam under the
lter.
17 After replacing the lter, close the lter lid until it is clicked back into
place. If the lter lid comes o, position the hinges at the bottom and
push the lter lid until it is clicked back into place.
NB: When you start the cleaner after lter replacement, It takes 10
seconds before the FILTER indicator turns green (models with remote
control and AUTO function) or turns o (remote control models).*
18 Replace the motor lter when dirty or after every 5th s-bag. Push the
lter holder down and pull it out. Exchange the lter and close the lid.
VACUUMING WITH THE UNIVERSAL NOZZLE V*, W*
19 Change nozzle setting with the pedal. Icon illustrates recommended
oor type.
20 PureVision nozzle*: Move the nozzle forward. The front light turns on
automatically after a few seconds. When the nozzle is not used, the
light turns o automatically after a few seconds.
CLEANING THE UNIVERSAL NOZZLE V*, W**
21 Disconnect the nozzle from the tube. Clean with the hose handle.
CLEANING THE TURBO NOZZLE X*
22 Disconnect the nozzle from the tube and remove entangled threads etc
by snipping them away with scissors. Use the hose handle to clean the
nozzle. *
3IN1 ACCESSORY TOOL
23 Pull the textile tab to take out 3in1 tool. The tool has 3functions, see
pictures on next page.
24 After usage, put it back in its place.
2www.electrolux.com
GB
FR
AR
BG
GR
NO
CZ
HR
PL
DE
HU
PT
DK
IT
RO
EE
LT
RU
ES
LV
SE
SL
FI
NL
SK
SR
TR
UA
Eestikeelne juhendi allalaadimine (PDF, 6.04 MB)
(Mõelge keskkonna peale ja printige see kasutusjuhend välja ainult siis, kui see on tõesti vajalik)

Loading…

Hinnang

Andke meile teada, mida arvate tootest Electrolux PD91-ANIMA Tolmuimeja, jättes selle kohta hinnangu. Kas soovite jagada oma kogemusi selle tootega või esitada küsimuse? Jätke kommentaar lehe alumises servas.
Kas olete teenusega Electrolux PD91-ANIMA Tolmuimeja rahul?
Jah Nr
Olge esimene, kes seda toodet hindab
0 häält

Liituge selle toote teemalise vestlusega

Siin saate jagada, mida arvate Electrolux PD91-ANIMA Tolmuimeja kohta. Kui teil on küsimusi, lugege esmalt hoolikalt kasutusjuhendit. Kasutusjuhendit saab taotleda kasutades meie kontaktivormi.

Lisateavet selle juhendi kohta

Mõistame, et on tore, kui teil on teie Electrolux PD91-ANIMA Tolmuimeja jaoks paberjuhend. Juhendi saate alati meie veebisaidilt alla laadida ja ise printida. Kui soovite originaaljuhendit, soovitame võtta ühendust ettevõttega Electrolux. Nad võivad anda originaaljuhendi. Kas otsite oma Electrolux PD91-ANIMA Tolmuimeja kasutusjuhendit mõnes muus keeles? Valige meie kodulehelt oma eelistatud keel ja otsige mudelinumbrit, et näha, kas see on meil saadaval.

Tehnilised andmed

Kaubamärk Electrolux
Mudel PD91-ANIMA
Kategooria Tolmuimejad
Faili tüüp PDF
Faili suurus 6.04 MB

Kõik Electrolux Tolmuimejad kasutusjuhendid
Veel Tolmuimejad käsiraamatuid

Korduma kippuvad küsimused Electrolux PD91-ANIMA Tolmuimeja kohta

Meie tugimeeskond otsib kasulikku tooteteavet ja vastuseid korduma kippuvatele küsimustele. Kui leiate meie korduma kippuvates küsimustes ebatäpsusi, andke sellest meile teada, kasutades kontaktivormi.

Minu tolmuimeja voolik on ummistunud, mida teha? Kontrollitud

Eemaldage voolik ja vaadake see läbi, et teha kindlaks, kas see on tõesti ummistunud. Sellisel juhul võite võtta pika eseme, näiteks luudakese ja suruda selle ettevaatlikult voolikust läbi. See eemaldab üldiselt kõik voolikut ummistavad esemed. Kui see ei aidanud, võtke ühendust tootjaga.

Sellest oli abi (1464) Loe rohkem

Mis suurusega tolmukott on olemas? Kontrollitud

Kaaluda tuleb kahte suurust. Esiteks on koti sissepääsuga plaadi suurus. See määrab, kas tolmukott sobib teatud tolmuimejale. Siis on koti suurus. Seda näidatakse enamasti liitrites ja see määrab, kui palju tolmu kott mahutab.

Sellest oli abi (941) Loe rohkem

Soovin teada oma Electroluxi seadme vanust. Kuidas seda teha? Kontrollitud

Toote vanuse saate määrata seerianumbri abil. Selle leiate oma seadmest. Seerianumbri esimene märk tähistab aastat (st: 1 = 2001) ja kaks tähemärki pärast seda näitavad tootmisnädalat (st: 35 = selle aasta 35. nädal). Seega näitab seerianumber 13500016, et masin on pärit 2001. aasta 35. nädalast.

Sellest oli abi (836) Loe rohkem

Minu tolmuimeja toitejuhe ei keri seadmesse tagasi, mida teha? Kontrollitud

Võimalik, et juhtmes on väänet või voldikut. Rullige juhe paar korda täielikult välja ja kerige see käte juhendamisel tagasi seadmesse. Kui see probleemi ei lahenda, on juhtme tagasikerimise mehhanism katki. Sellisel juhul võtke ühendust tootja või remonditeenindusega.

Sellest oli abi (658) Loe rohkem

Minu tolmuimeja teeb vilistavat häält, mida teha? Kontrollitud

Selle probleemi põhjuseks on sageli täis tolmukott või filter või kui seal on ava, mis laseb voolikusse õhku. Kontrollige tolmukotti ja filtrit ning vajadusel vahetage need välja. Kontrollige, kas voolikul pole auke ega halbu ühendusi. Kui see probleemi ei lahenda, võtke ühendust tootjaga.

Sellest oli abi (551) Loe rohkem

Kuidas tolmu ja juukseid tolmuimeja harjapea küljest eemaldada? Kontrollitud

Tolmu ja juuste eemaldamine tolmuimeja harjapeast on tehtud käsitsi. Kui see ei lähe soovitud viisil, on võimalik ülejäänud mustuse eemaldamiseks kasutada peent kammi.

Sellest oli abi (536) Loe rohkem

Millist tolmuimeja harjapea seadet peaksin kasutama? Kontrollitud

Peaaegu kõigil tolmuimejatel on reguleeritava harjaga pea. Kasutage pintslit kõvade pindade jaoks, et vältida kriimustusi ja kahjustusi. Vaipade ja vaipade jaoks lülitage harja välja.

Sellest oli abi (419) Loe rohkem

Kas ma saan paberitolmukotti kasutada rohkem kui üks kord? Kontrollitud

See ei ole soovitav. Koti vatti poorid küllastuvad, põhjustades imemise kadu ja kahjustades mootorit.

Sellest oli abi (286) Loe rohkem

Mis on HEPA? Kontrollitud

HEPA tähistab kõrge efektiivsusega tahkete osakeste õhku. Paljudel tolmuimejatel on HEPA -filter. HEPA -filter peatub vähemalt 85% ja kõige rohkem 99,999995% kõigist osakestest, mille suurus on 0,3 mikromeetrit (µm) ja rohkem.

Sellest oli abi (260) Loe rohkem

Kas ma saan tuha imemiseks kasutada tavalist tolmuimejat? Kontrollitud

Ei, see pole absoluutselt võimalik. Jahtununa tunduv tuhk võib olla seest veel soe või isegi kuum. Tavaline tolmuimeja pole selleks ette nähtud ja see võib põhjustada tulekahju. Samuti ei sobi tavaliste tolmuimejate filtrid alati eriti väikeste osakeste, näiteks tuha, hoidmiseks. Seejärel võib see jõuda tolmuimeja mootorini ja põhjustada kahjustusi.

Sellest oli abi (251) Loe rohkem
Kasutusjuhend Electrolux PD91-ANIMA Tolmuimeja

Seotud tooted

Seotud kategooriad